Cosmetic Bags

OEM Studio Brush Roll Organizer

Studio Brush Roll Organizer · Beauty brands, brush-set programs and private-label cosmetic organization

Editorial design reference for customization; final details are confirmed through sampling.

Reference size
Specified to the project brief
MOQ
Confirmed for the requested program
Sampling
Confirmed after the specification is agreed
Bulk production
Confirmed after sample approval and order review
Discuss OEM development Compare cosmetic bag formats

Made-to-order B2B production. Specifications are confirmed through sampling.

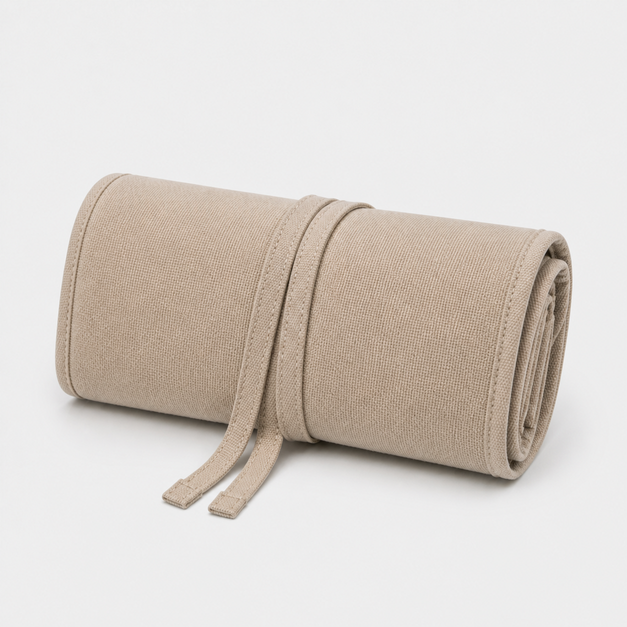
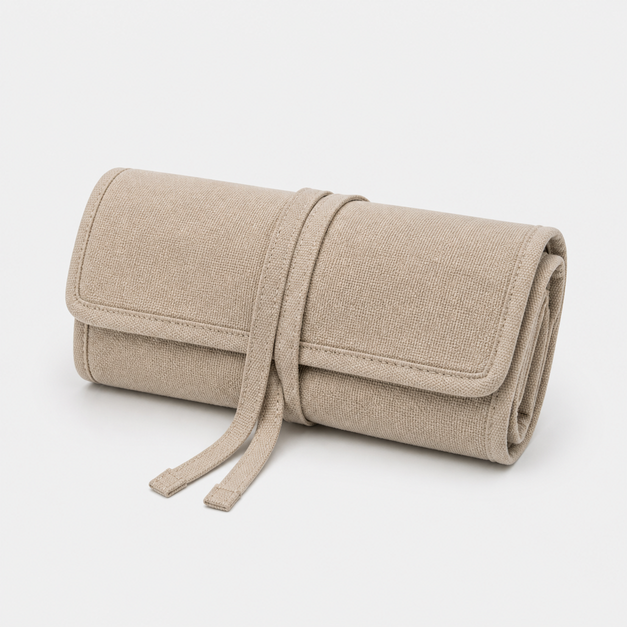
An OEM makeup brush roll direction for branded brush sets and cosmetic organization programs. Define the intended tool profiles before confirming the graduated slots, fold-over flap and twin-tie closure.

Look closer at the construction

Use the open interior and detail views to specify the brush-slot map and closure build.

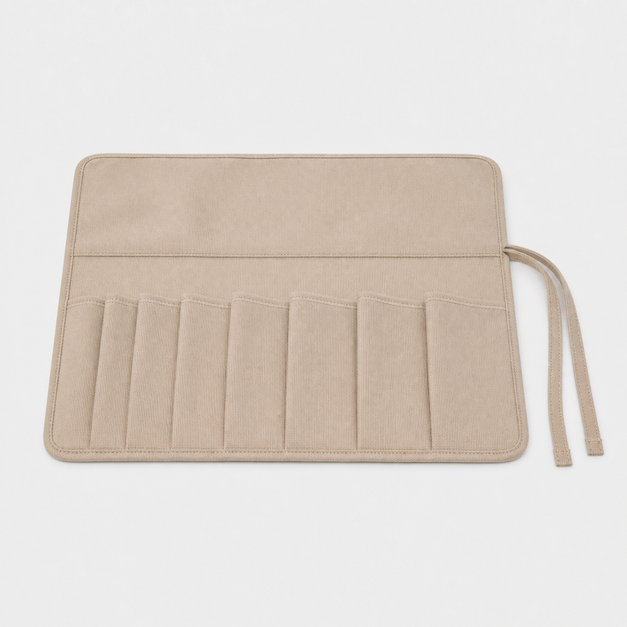
Studio Brush Roll Organizer, open empty interior editorial design reference

Graduated slot organization

The open reference shows empty slots in graduated widths beneath a fold-over flap. Map each slot to an intended tool profile before fixing the stitch lines.

  • Protective fold-over flap
  • Graduated-width brush slots
  • Twin securing ties
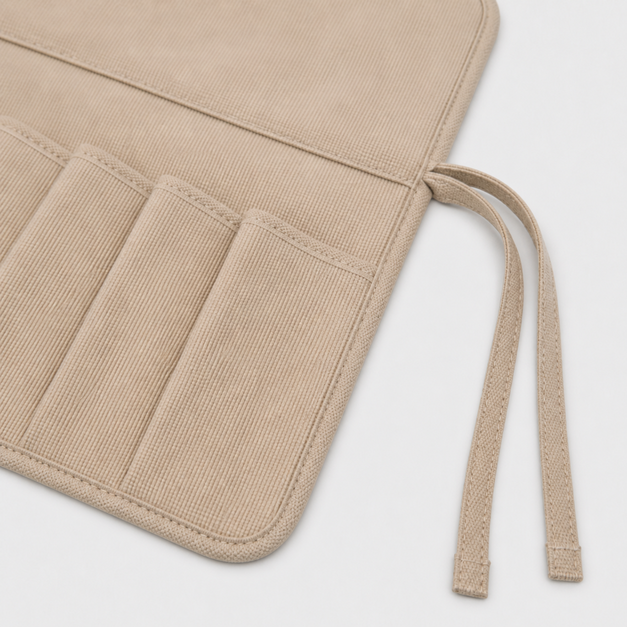
Studio Brush Roll Organizer, slot and tie construction detail editorial design reference

Slot, flap and tie finishing

Review the warm stone shell direction, bound edges, slot stitching and twin-tie attachment as one configurable construction package.

  • Warm stone woven textile direction
  • Coordinating woven backing direction

Reference visuals, not production approval. Features, construction and any performance requirement must be confirmed on your sample.

MATERIAL BUILD

Makeup brush roll materials

The listed materials are an editorial starting direction for the Studio Brush Roll Organizer. Confirm the actual shell, backing, binding and ties during development.

Studio Brush Roll Organizer, slot and tie construction detail editorial design reference

Outer material

Reference directionWarm stone woven textile direction

Review a physical swatch for shade, hand feel, fold behavior and decoration compatibility before approving the shell specification.

Backing & inner finish

Reference directionCoordinating woven backing direction

Set the backing shade, slot-edge finish and flap construction around the intended brush-set brief.

Support & structure

Reference directionTo be defined with your sample

Agree the balance between a flexible roll and clear slot definition after reviewing the empty and loaded sample.

The close-up belongs to this editorial design reference. It does not verify fiber composition, coating, certification or performance.

How to choose bag fabrics and linings

OEM specification options.

Treat each option as a development decision for the brush-set program, not a fixed specification.

Customization options

  • Slot count and widths
  • Flap depth
  • Tie construction
  • Branding placement
Size & layout
Provide the intended tool profiles and mark the slot count, width sequence, flap depth and final rolled proportion.
Materials & trims
Confirm the warm stone shell, backing, edge binding and twin ties through swatches and sampling rather than relying on the image.
Brand & packaging
Supply artwork, decoration method, placement and packing instructions. Approve the final appearance on the agreed sample.

FUNCTIONAL DETAILS

Makeup brush roll design decisions

Use these checks to turn the Studio Brush Roll Organizer reference into a specific brush-set brief.

Studio Brush Roll Organizer, unrolled back editorial design reference

Graduated slot map

Set each stitch line around an intended tool profile instead of dividing the roll into equal spaces by default.

Buyer questionWhich tool profile belongs in each slot?

Protective flap depth

Choose how far the fold-over flap should cover the slot openings when the organizer is rolled.

Buyer questionHow much top coverage does the agreed brush set require?

Twin-tie placement

Review the two ties on the rolled sample so the closure position suits the final fill and fabric bulk.

Buyer questionWhere should the ties meet on the finished roll?

Discuss changes before the pattern is finalized. The pictured configuration is an editorial reference, not the final specification for an order.

YOUR DEVELOPMENT PROCESS

Developing your makeup brush roll

A practical sequence for developing the Studio Brush Roll Organizer around an agreed tool profile map.

  1. Map the intended tools

    Your input
    Provide the tool profiles, preferred sequence and branding requirements for the organizer.
    Review output
    An agreed slot map and development priorities for the reference.
  2. Choose the material set

    Your input
    Review shell, backing, binding and tie directions against the preferred appearance and folding behavior.
    Review output
    Material and trim choices recorded for sampling.
  3. Review the first sample

    Your input
    Place the intended tools in their slots and review the flap, rolling sequence and tie position.
    Review output
    Written fit and construction comments with required revisions.
  4. Approve the complete version

    Your input
    Confirm revised dimensions, artwork placement, materials, colors and every agreed change.
    Review output
    An approved sample and specification for the order.
  5. Set the bulk checks

    Your input
    Agree measurement, construction and appearance checkpoints; define separate testing only when required by the brief.
    Review output
    A checklist tied to the approved version.
  6. Confirm packing & dispatch

    Your input
    Specify packing, labels, carton information and dispatch requirements.
    Review output
    Agreed packing details and shipment coordination.

SamplingConfirmed after the specification is agreed

Bulk productionConfirmed after sample approval and order review

Timing is confirmed for the agreed specification, revisions, material availability and production schedule.

How to review and approve a bag sample

Before approving the sample

Explore development capabilities
  1. Fit & access

    Place every intended tool in its assigned slot and review insertion, removal and flap coverage.

  2. Construction

    Inspect slot stitch lines, bound edges, flap fold and twin-tie attachments against the approved specification.

  3. Brand details

    Check artwork size, placement, color, label wording and packing before approval.

Chat on WhatsApp